After you send a message, you can review the message, and then access the Recipients page to use the Recipient Display Filter.
When the Recipients page opens, the filter fields on the Recipients Display Filter correspond to the linked data that you clicked to access the page. The results, or recipient data, corresponds to the selected filter fields and shows the recipients' names, the date and time of the last contact attempt, the total number of contact attempts, and the response. When you change filter field selections, the resulting recipient data is adjusted to provide valid results.
Note: The images in this procedure show the system as it appears by default, and the tabs, fields, and labels on your page may be different.
For more information, go to the topic Recipient Display Filter.
To view message recipients
1. Go to Messages, and on the left, click Sent. The Sent message folder opens.
2. Locate the message, and click the message subject. The message opens.
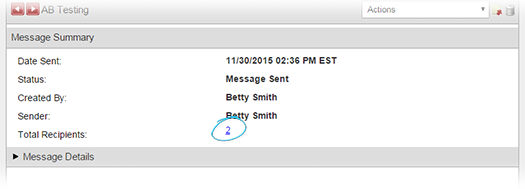
3. To review the recipient information, click the linked number of Total Recipients.
If you want to review information about... |
Go to the... |
And... |
All recipients, |
Message Summary, Recipient Statistics: All Recipients, or Message Details section, |
Click any linked number, status, or response parameter. The Recipients page opens. |
Recipients in a specific container, |
Recipient Statistics: By Containers section, |
Take one of these actions: ● Click any linked number, and the Recipients page opens. ● Click a linked Recipient Container, and the Recipient List opens. Click any linked number, status, or response parameter. The Recipients page opens. |
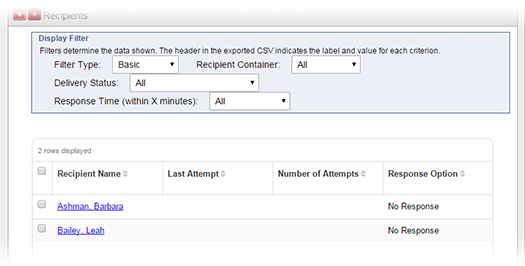
4. Review the recipient data.
5. To use the Display Filter:
If you want to... |
Go to the filter menu... |
And... |
View information about the device on which the recipient received the message, |
Filter Type, |
Click Advanced. A column with recipient Device information appears. |
View information for a specific container of recipients, |
Recipient Container, |
Click the name of a container. The table refreshes to show only recipients in that container, who also have the selected Delivery Status and Response Time. |
View information for recipients with a specific combination of the Delivery Status and Response Options, |
Delivery Status, |
Click a Delivery Status. The table refreshes to show only recipients with that status, who also have the selected Recipient Container and Response Time. |
View information for recipients with a specific response time, |
Response Time, |
Click a Response Time. The table refreshes to show only recipients with that time, who also have the selected Recipient Container and Delivery Status. |
View information for recipients who had the message delivered with a specific method, |
Filter Type, and then Response Time, |
For Filter Type, click Advanced. The table refreshes. For Delivery Method, click a Delivery Method. The table refreshes to show recipients who received the message with that Delivery Method. |
6. Optionally, take any of these actions:
If you want to... |
Then... |
Sort messages, |
● Click a column header (for example, Type, Subject, Sender, Status, or Date). The messages are rearranged in alphabetical or ascending order depending on the contents. ● Click the column header again to rearrange messages in the reverse alphabetical or descending order. |
Export delivery and response data for all resulting recipients, |
Click the Export Filter Results (CSV)
icon |
View a recipient's profile, |
Click the linked Recipient Name. The person's Profile opens in a new window. The Profile contains contact, group, organization, employment, change history, and account settings for that person. |
Send a message to a recipient, |
● On the row for each recipient that you want to message, select the check box. ● In the Select an action menu, click Send Message. ● Click Submit Action. The Compose message page opens, and the selected recipients are already added as recipients on the new message. |
Add one or more recipients to an existing group, |
● On the row for each recipient that you want to message, select the check box. ● In the Select an action menu, click Add to Existing Group. The Group Name menu appears. ● Click Submit Action. The recipients are added to the group and the table refreshes to deselect them. |
Add one or more recipients to a new group, |
● On the row for each recipient that you want to message, select the check box. ● In the Select an action menu, click Add to New Group. The Group Name, Viewable By and Allow other administrators to make changes or delete this group fields appear. ● Enter the information. ● Click Submit Action. The recipients are added to the group and the table refreshes to deselect them. |
Export delivery and response data for a select group of resulting recipients, |
● On the row for each recipient that you want to message, select the check box. ● In the Select an action menu, click Export Users. ● Click Submit Action. The Compose message page opens, and the selected recipients are already added as recipients on the new message. |